9 Oil Painting Techniques Every Artist Must Know
Most oil painting techniques keep captivating aspiring and experienced artists from all over the world. And it’s easy to understand why:
Oil paints provide artists with countless creative possibilities to express their inner worlds and ideas.
Say what you will, but techniques such as blending and layering can do wonders for your next oil artwork. Subsequently, mastering these techniques will help you transport your imagination and creative ideas in a way that will allow you to express yourself to the fullest.
Nowadays, painting techniques for artists working with oil are the cornerstone of artistic exploration. Today, I’ll show you plenty of them!
Recommended Read:
- 25 Acrylic Painting Techniques For Beginners
- How To Use Acrylic Paint
- 30 Acrylic Painting Tips For Beginners
The Golden Rules Of Oil Painting

If you fancy yourself as a professional artist, you probably know the golden rules of oil paintings inside and out. Still, I’ll cover these rules briefly because some of you may not know them yet.
Assuming oil paints are your favorite materials to work with, you should never forget the three rules for working with them. These rules are slow drying over fast drying, thick over thin, and fat over lean.
Let me explain how to apply the rules each time you create an oil painting:
By all means, each layer of oil paint must be slow drying and ticker than the one below it. One way to achieve that is by placing more paint on the brush with every layer.
Mastering the three rules of oil painting takes time and practice. Once you start employing these rules effortlessly, you can combine them with different oil painting techniques.
Oil Painting Techniques For Beginners
1) Underpainting
Using oil paints for the first time might prove an intimidating experience for most newbie artists. There is no need to fear oils as a medium, especially considering the underpainting technique will allow you to sketch your artwork before applying any colors.
Underpainting is a method you can use to establish the foundation of your artwork. It entails creating an initial layer of paint on the canvas that serves as a base for subsequent layers of color.
In my opinion, using the underpainting technique is crucial for artists with less experience with oil paints. After all, underpainting can be the roadmap you need to create a structure to follow while you build up layers and add details.
2) Chiaroscuro
Do you know that chiaroscuro is an Italian term that means Light Dark in English?
Chiaroscuro is one of the most popular oil painting techniques you can use when creating paintings or drawings. That technique will allow you to create a contrast between the light and dark areas of your artwork.
Are you wondering why artists worldwide are so fond of the chiaroscuro technique? I think that has something to do with the fact that the technique is an excellent way to create a 3D illusion of shapes and forms.
3) Scumbling

Next on my list of invaluable oil painting techniques is stumbling. Scumbling is a technique you should use each time you want to add more texture to your artwork.
Let me elaborate further on that:
Generally, scumbling involves applying a thin layer of lighter paint over a darker one that is already dry. Doing so will have a subtle effect – that’s why scumbling should be your go-to technique for softening edges and adding highlights.
4) Blocking In
You may not know that yet, but blocking in is one of the best ways to begin the creation of your oil artwork:
We’re talking about a technique that involves physically blocking the shapes and colors you plan to use later. Most artists use the blocking in technique to create the initial composition and proportions of their artwork.
Personally, I find the blocking in technique invaluable because it allows me to plan the overall design of my artwork in progress. It’s worth mentioning that the same technique will help you balance your art elements while you prepare the add further details.
5) Blending
I don’t think there is a beginner painter who doesn’t use blending in one way or another. And why shouldn’t newbie artists rely heavily on blending?
Blending allows your tones and colors to transition smoothly once you mix them while they are still wet. Moreover, using the blending technique is a smart way to get rid of visible brushstrokes.
More often than not, artists implement blending while creating landscapes, portraits, and still-life paintings.
6) Impasto

Are you familiar with the impasto technique? Chances are, you already know what impasto is, considering it’s one of the most heavily used oil painting techniques.
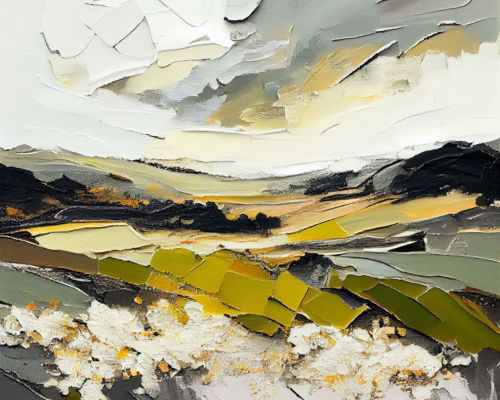
To sum up, impasto is a technique that requires placing a thick layer of paint onto the canvas to come up with a texture and 3D effect. You can take advantage of the impasto technique each time you want to emphasize specific areas of your artwork.
Artists like Vincent van Gogh used impasto to create tactile surfaces in his paintings. So, if Impasto is good enough for him, I guess it would be good enough for you too!
7) Alla Prima
Quite frankly, Alla Prima is not suitable for beginner painters. Alla Prima is the only one from all oil painting techniques that works best if you can complete a painting in a single session.
With that said, Alla Prima is a technique most people know as wet-on-wet painting. As such, the technique requires applying paint on a wet surface before the underneath layers are completely dry.
By all means, Alla Prima contradicts the common layering techniques, and that can be a good thing, especially if you work on an art project you want to finish as soon as possible.
8) Grisaille
It’s not far-fetched to think that most first-time painters don’t know that term “grisaille” comes from the French word “gris,” which means gray. Grisaille artworks lack color and rely on darkness and lightness to create the illusion of form and depth.
Usually, the grisaille oil painting techniques are fantastic for practicing underpainting. Also, that technique will serve you well while you’re studying the creation of form and light in a painting.
You can create a grisaille effect on your artwork if you work with other mediums than oils, such as acrylics and watercolor paints.
9) Glazing
There is no doubt in my mind that the glazing technique is the one to use to achieve rich layers of depth and color. In short, glazing entails applying thin and transparent layers of oil paint over other layers that are already dry.
Glazing is commonly used by artists to enhance colors and create a sense of depth within artistic shapes and forms.
Keep in mind that constantly using the glazing technique will be a time-consuming experience.
Oil Painting Techniques FAQs
What Are The Basic Steps In Oil Painting?
- Pick a subject
- Come up with a primary composition for your painting
- Do most of the drawing
- Create the background
- Apply the layers of paint
- Add the final touches
How Much Oil Do You Mix With Paint?
Generally speaking, you should add no more than two drops of oil to each paint color. Place the oil into the center of the paint so the mixing will be an easy process.
What Is The Best Mix For Oil Paint?
Many artists don’t hesitate to mix oil paints with turpentine and linseed oil to accomplish the consistency they aim to reach.
Are You Supposed To Mix Oil Paint With Water?
Above all, you should never mix oil paints with water – adding water to your oils will destroy the quality of them.
Can I Use Olive Oil For Oil Painting?
Using non-drying oils is not a good idea when creating an oil painting. Olive oil and almond oil are not suitable for oil artwork.
Final Say
I guess I have no more oil painting techniques to share with you at the moment:
The ones you see above will have to do for now!
Do you have any questions on this topic?
Which are your favorite techniques when creating an oil painting?
Tell me in the comment section below, please!